Hello everyone 👋,
In this article, we are going to see how to create a reusable HTML Element/component with only plain JavaScript.
Yes, you heard it right.
In this web development world, everyone might have encountered of creating at least one custom component with Angular/React/Vue. But, have you ever wondered how it is achieved? Let's dive in!
Web Components
Web Components is the basic building logic of creating the custom components.
Here's the definition:
Web components are a set of web platform APIs that allow you to create new custom, reusable, encapsulated HTML tags to use in web pages and web apps. Custom components and widgets build on the Web Component standards, will work across modern browsers, and can be used with any JavaScript library or framework that works with HTML.
Most of them aware that, the reason to create a custom component is because the required feature is not available in the existing HTML world. Assume, We can use, <button> tag to render a button and top of it we can add a style as per the need. But, what if, if we need a customized feature, like a common app header that should be re-used in all the applications.
One solution is, we can copy & paste the code in all the projects. But, it leads to the following problem
- Adding any new change should be done in all the projects.
- Code Repetition.
- Non maintainable.
That's where Web Components comes into this picture.
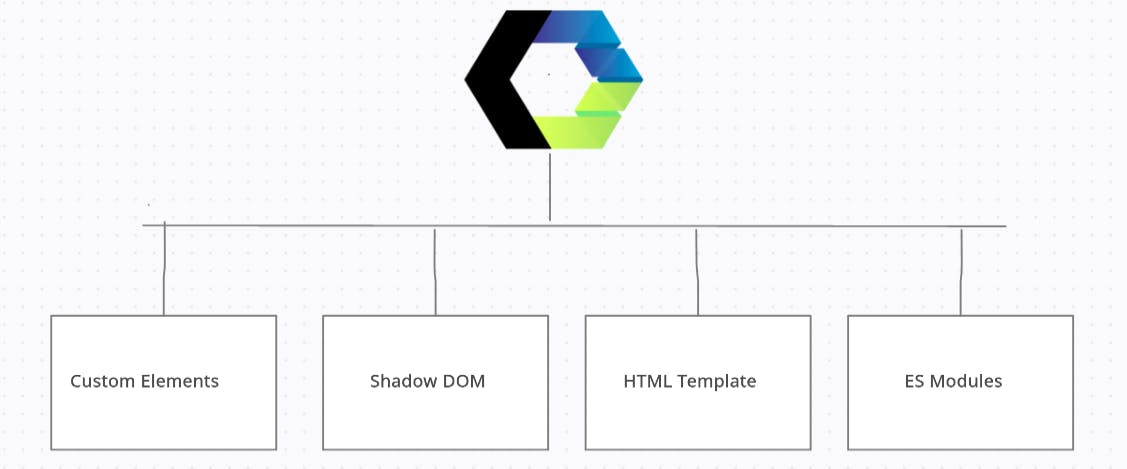
Web components are based on four main specifications:

In this tutorial, we going to see the 1st specification - Custom Elements.
Custom elements lays the foundation for designing and using new types of DOM elements.
Let's begin by creating a reusable AppHeader Custom element.
First, create a new class, let's say AppHeader & extend HTMLElement. Then, call super() inside constructor. The below 2 methods are like lifecycle hook.
connectedCallback is called when the element is added to the DOM.
disconnectedCallback is called when the element is removed from the DOM
Finally, assign the HTML selector with the AppHeader class by
// first parameter is the tag name and second parameter is the class for the new HTML element.
// tag name should always have hyphen(-). In this case, it is app-header.
customElements.define("app-header", AppHeader);
Here is the complete app.js content:
class AppHeader extends HTMLElement {
    constructor() {
        super();
        console.log("constructor called");
    }

    connectedCallback() {
        console.log("connectedCallback called");
       // creating a content to user to user
        this.innerHTML =
            "This is the header content rendered from app-header custom element";
    }

    disconnectedCallback() {
        console.log("disconnectedCallback called");
    }
}

// first parameter is the tag name & second parameter is the class for the new HTML element.
customElements.define("app-header", AppHeader);

// this function is to demonstrate the disconnectedCallback lifecycle
function removeCustomElement() {
    document.querySelector("app-header").remove();
}
Here's the index.html code:
<html>
    <head>
        <title>Custom Component</title>
    </head>

    <body>
        <h1>Custom Components</h1>
        <p>Lets learn how to create custom component.</p>

       <!-- Newly created HTML element with Plain JS -->
        <app-header></app-header>

        <div style="margin-top:20px">
        <button onclick="removeCustomElement()">Remove Custom Element</button>
        </div>
        <script src="app.js"></script>
    </body>
</html>
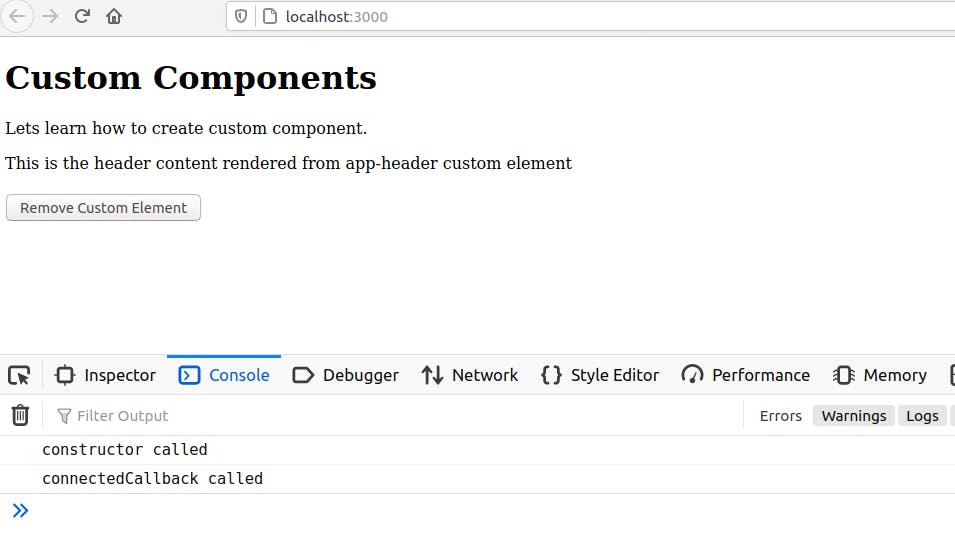
Here's the output from the browser:
You can see This is the header content rendered from app-header custom element is rendered from <app-header> component/element. WOW, with Plain JS a custom component is created 🤯 🙌.

If you notice the console tab, you can see only 2 logs are there. First is constructor is called and then connectCallback. But, where is disconnectedCallback log?
If you recall, disconnectedCallback will be called only when it is removed from DOM.
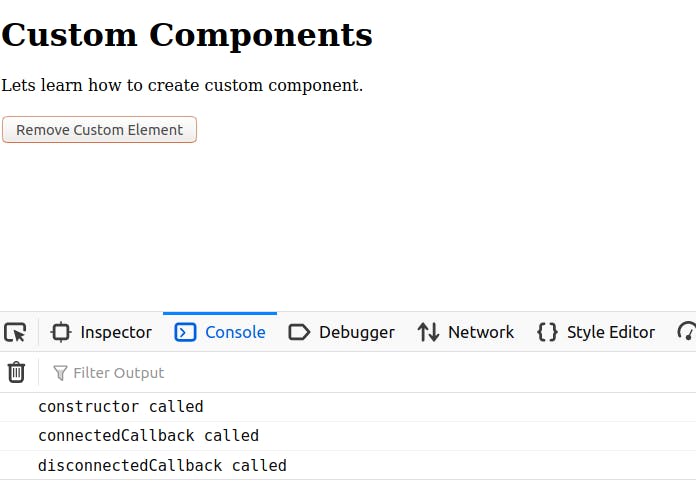
Let's remove from DOM by clicking the button Remove Custom Element.
Now, you can see disconnectedCallback in the console & the <app-header> content is removed from the content.

Thanks for reading the article. We will explore more the other 3 specification in the upcoming article.
You can find the links to my previous articles below. If you haven't read it, Please check it out!
